Free Carbon Neutral Shipping On Orders $75+, Plus 4 Free Samples!

Pay with Klarna

Connect with Us and Get FREE Shipping. Sign Up!

mini OI shampoo, OI milk, OI conditioner inside a packed suitcase

How to Achieve Heatless Curls

Updated on September 8, 2025 | 4 min read

Lauren Hannel, Davines Writer


Like many people, I find that my hair texture and wave pattern can fluctuate — one day I’ll step out of the shower with moisturized little ringlets, and the next wash day my good friend Humidity will leave me with limp, frizzy strands. So in an effort to get an even, overall curl, I’ll end up using a curling wand to get the uniformity I desire. While this isn’t the hardest hair routine in the world, constantly turning to heat styling products can end up damaging your strands, leaving you with fragile, dry hair. Of course you should always use a heat protectant spray when you’re using hot styling tools on your hair, but repeated exposure to high heat won’t be doing your hair health any favors. Lucky for me (and anyone else who wants to achieve beautiful, easy curls without always turning to a curling wand), there are several ways that you can get heatless curls — and the best part is that most only require a few products!

Key Takeaways

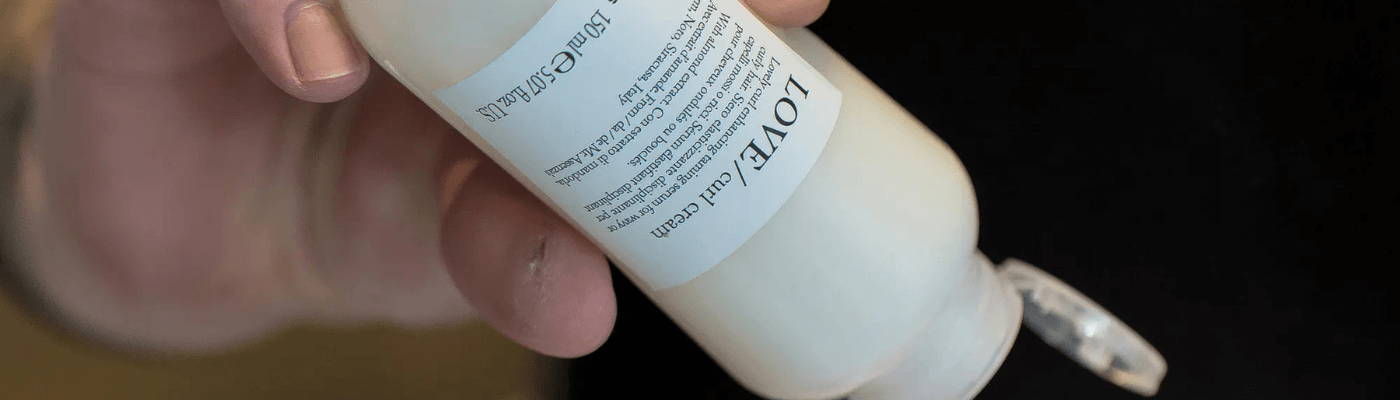
  • Products that fight frizz and smooth strands are essential for heatless curls. 
  • The heatless method prevents long-term heat damage and maintains the health of your hair.
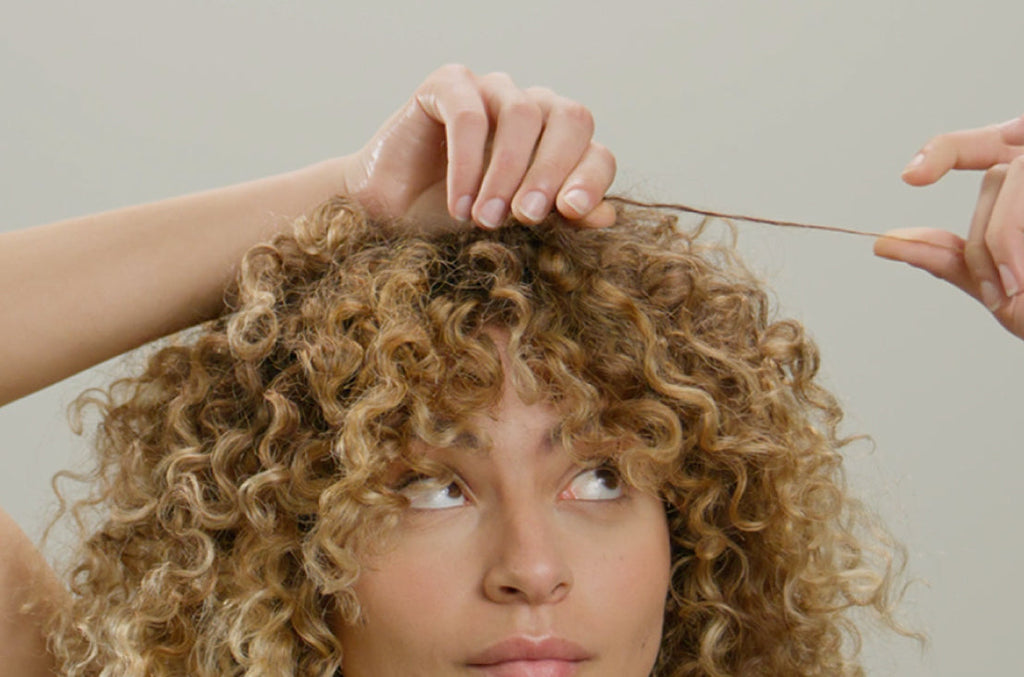
  • Using hair rollers or bobby pins helps create curls without the need for a heat styling tool. 
  • Styles like braids or buns can be used for tighter curls or loose waves.
  • Silk and satin pillowcases prevent additional friction and are great for maintaining your heatless styles at night. "

In This Article

Techniques for heatless curls

Here are some of the easiest ways you can achieve heatless curls. From beach waves to ringlets, no matter which tutorial for these hairstyles you choose to try, using curly hair products is a smart base to help your hair resist humidity, fight frizz and bring elasticity back to curls, no heat required.

1. Braiding

This is the technique most of us are probably familiar with: if you braid your hair when it’s wet and let it sit for a while, you’ll be left with a head full of waves. Just remember that the smaller the braids, the smaller and tighter the waves, so those looking for typical “loose mermaid waves” hairstyles might want to just stick with two braids on each side of the head.

2. Finger coiling

This was one of the most valuable tips my hairdressers ever gave me when it comes to effortless curls that don’t add any extra time into my morning routine. As it turns out, your hands are actually a pretty nifty styling tool to curl your hair, no irons required. Here’s a quick tutorial on finger coiling:
  • First, wash and condition your hair with a curl shampoo and curl conditioner.
  • After towel-drying, apply a curl cream or curl building serum all over your hair. These products are an important step to help your curls hold their definition and structure when you go to set them.
  • Divide your hair into sections — then start by wrapping small sections of hair around your finger, twirling it tightly, then releasing. When you’re finished with your whole head, let it air dry and enjoy your beautiful defined curls.

3. Overnight waves

Throwback time! This tutorial is a classic for a reason: Tara’s signature heatless (or heartless, as she calls them) waves are 50% prep work, and 50% sleeping. A winning combination if you ask me.
  • Start by washing your hair with a smoothing shampoo and finishing with a smoothing conditioner. This will fight frizz and help to keep your waves shiny and even.
  • After towel-drying, apply atexturizing serum, which will smooth your hair and leave you with some soft, beachy texture when your waves are done.
  • Part your hair as desired, then divide into two sections into a loose, twisty braid. We recommend watching Tara’s tutorial to see her braiding technique!
  • And now for our favorite step: sleep on it. When you wake up the next morning, un-twist your hair and gently work your fingers through the waves to help break them up slightly. For a shiny finishing touch (and to combat any little flyaways that might come up from tossing and turning), run a light hair oilthrough your strands.

4. Rollers

I have a vivid memory growing up in the late 90’s/early 2000’s of my mom’s hot pink set of hair rollers. While she preferred the hot kind (how else would you get that signature 90’s volume?) you can also use curlers (aka hair rollers) in this easy heatless curl tutorial.
  • After towel-drying and detangling your hair, let it air dry for a while until it’s about 70-80% dry. This will help your hair hold the curl better, rather than overly-wet hair which might not be as moldable.
  • Start by dividing your hair into sections, then roll and secure separate parts into the rollers. If you’re nervous about hair falling out (which might be the case if your hair is on the thinner side), secure the rollers with bobby pins.
  • For extra sleep security, wrap your head in a silk or satin scarf. This will keep the rollers tightly in place, and these types of materials are way more gentle on your strands compared to traditional cotton towels.
  • The next morning, remove the scarf and gently unravel each of the curls. Set your curls in place with a medium hairspray or shimmering mistto make sure all of your hard work with the curlers looks its best.

5. Put it in a bun

You know how wearing your hair in a bun is an easy way to give your hair some lift right from the root? As it turns out, altering this hairstyle slightly can also leave you with beautiful waves and curls. After parting your hair, divide it into the desired amount of sections — just like with braids, the smaller the bun, the tighter the waves. Twist each section into a bun, pin or secure them with an elastic, and voila! You’ll have beautiful waves when you take them out the next day.

 6. Pin curls

Another retro hair classic, the pin curl technique is another simple way to get beautiful, heatless curls. All you’ll need are some bobby pins, styling product and a mirror to watch your work.
  • Towel-dry your hair and allow it to air dry slightly. Look for the same amount of “almost-dryness” we discussed in the hair rollers tutorial.
  • Apply a styling product that will help your curls set: either the curl cream and serum mentioned before will work, but you might also want to try a light modeling gel if your hair doesn’t hold curls well.
  • Part your hair as desired, and divide it into inch-wide sections all over your head.
  • Working section by section, roll your hair up to the root and secure it with a criss-cross of two bobby pins.
  • Let your hair air dry or sleep on it — if you’re wearing this look to bed, we’d recommend a head wrap as mentioned in the hair roller tutorial.
  • Remove the bobby puns, unravel the curls and gently work your fingers through your hair.
  • Finish with a hair oil and spritz of hairspray to secure the style and add shine.

7. Headband curls

Our last hair tutorial will leave you with bouncy, voluminous curls, and all you need is a headband!
  • When your hair is slightly damp, apply a curl mousse to help secure the style and add hydration and volume.
  • Put a headband over the top of your head, resting it on top like you would wear a crown.
  • Starting at the front of your hair, take a small section of hair and loop it over the headband and back through the bottom. This tutorial is really helpful if you need to visualize it better.
  • Once the first section is pulled through, add more hair to it and repeat the process. Continue adding and looping hair until you’ve finished one side of your hair, then do the same thing for the other side.
  • Loop the remaining hairs in the back through the headband, pin them in place then secure with hairspray.
  • Let your curls down and enjoy the bouncy, pretty waves of your dreams.

Daily Care Travel Set

A combination of DEDE Shampoo and Conditioner, plus This is an Invisible Serum in travel sizes make up this daily care travel set, perfect for fine or short hair in humid conditions.
Sale Off
Davines-BDHCIT00040-Trial-Kit-Capelli-Corti-3pz-1.jpg
$61.00
Sale Off
Davines-BDHCUS00037-Oi-Travel-Set-3pz-1.jpg
$59.00

Oi Travel Set

This nourishing travel set is the ultimate product combo for nourishing and softening all hair types on the go. This set includes travel size products of OI Shampoo, OI Conditioner and OI All in One Milk.
Sale Off
Davines-BDHCUS00037-Oi-Travel-Set-3pz-1.jpg
$59.00

Colored Hair Travel Set

Traveling with colored hair? This color-safe travel set comes with MINU Shampoo and Conditioner to protect your color and The Wake-Up Circle mask for volumized strands and a hydrated scalp.
Sale Off
Colored Hair Travel Set
$46.00
Sale Off
Davines-BDHCIT00033-Trial-Kit-Capelli-Biondi-3pz-1.jpg
$50.00

Blonde Care Travel Set

A blonde hair travel set featuring Heart Of Glass Shampoo, Conditioner and The Wake-Up Circle mask designed for shaded, natural or treated blond hair. Perfect for balancing, reviving and brightening blonde shades on vacation.
Sale Off
Davines-BDHCIT00033-Trial-Kit-Capelli-Biondi-3pz-1.jpg
$50.00

Dry Hair Travel Set

This dry hair travel set contains a combination of travel size hair products that nourish and soften strands. Including three bestsellers, MOMO Shampoo and Conditioner and The Renaissance Circle mask for shiny, fragrant vacation hair.
Sale Off
Davines-BDHCUS00038-Dry-Hair-Travel-Set-3pz-1.jpg
$46.00

Tips to help your curls stay

If you’re noticing that your curls and waves are looking a little limp after a day or so, try applying a curl revitalizing sprayto fight frizz and add elasticity and volume. Sometimes oil can be a culprit in making your hair look limp, so a spritz of dry shampooat the roots will also add volume without damaging your curls. If defined curls aren’t really your thing, and you’d just like some movement and piecey texture, a beach hair spray is a great way to get tousled, casual locks. And to keep your curls looking their best when you wake up each day, swap out your cotton pillowcase for one made of silk or satin. These materials allow your hair to glide over the surface of the pillow, which minimizes the chances of frizz, damage and breakage. Be sure to read our other blog posts “How to Make Your Curls Stay” and “How To Get Beachy Waves” for additional help in getting perfect curls and waves.

We hope these heatless curl techniques will leave you with shorter morning routines, healthier hair and beautiful looking curls. If you have any additional techniques that have worked for you, be sure to let us know in the comments!

FAQs

What hair products can I travel with?

You can travel with most hair products, being mindful that liquids, aerosols, gels, creams and pastes must be in containers of 3.4 ounces or less. This includes shampoo, conditioner, hairspray, mousse, curl cream, serum and styling gel. Shampoo bars and powders like dry shampoo are generally allowed without restrictions.

How to keep hair nice when traveling?

Keep your hair looking its best when traveling by focusing on hydration, seasonal protection and strategic styling. Deep condition before your trip, and use leave-in conditioner or hair oil during to combat dryness. Use dry shampoo for touchups on the go and wear protective styles to minimize frizz, tangles and breakage. Protect your hair from sun and heat with hats and UV protection sprays and stock up on the travel size versions of all your favorite hair care essentials.

How long do travel size hair products last?

Travel-size hair products typically last a week or longer, depending on the length of your hair, product type and frequency of use. For example, a TSA approved, 3.4 ounce bottle of shampoo should last a week with daily washing, but much longer if you wash less frequently. Things like hair length, hair type and washing/styling frequency will significantly impact how long a travel size hair product lasts.

How big can hair products be on a plane?

 TSA requires anyone traveling by plane to ensure liquids, gels, and aerosols are no more than 3.4 ounces each in your carry-on. However, there are no restrictions on the size of hair products packed in checked luggage.
salon chairs lined up by mirrors with davines products and plants

Post-Travel Reset

In need of some hair TLC after your travels? Get personalized care from a professional Davines stylist.

You Might Also Like...

Biotin and Collagen for Hair Growth
Biotin and Collagen for Hair Growth Discover how biotin and collagen boost hair growth and strength with Davines’ natural, sustainable...
Winter Hair Care Tips
Winter Hair Care Tips and Products to Support You Through Cold Weather Finding the right winter hair care heroes is...
Giving Tuesday 2025
Sustainable Beauty gives back this Giving Tuesday   15% of Davines' online sales will be given to EthioTrees, supporting reforestation...

Leave a comment

Comments will be approved before showing up.

Subscribe